Posts

Showing posts with the label tutorial

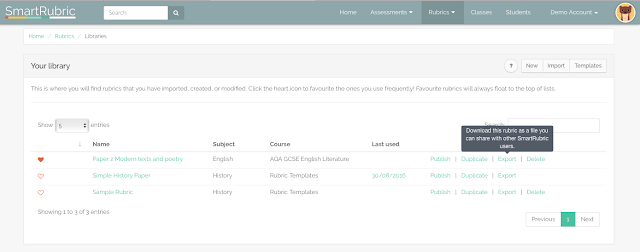
Matching a specification in SmartRubric - Weighting Assessment Objectives

Image
As exam season approaches, ensuring that you are providing accurate grades for mock exams and practice questions is really important. In this post, I'm going to explain the tools available to you in SmartRubric for setting up correctly weighted assessment objectives.  SmartRubric is a GIGO  system -- if you set up a good rubric, your marking experience will be smooth, accurate and painless. If you set up an awkward or incorrect rubric, you will not get the most out of SmartRubric. But don't worry -- I'm here to help! You can always  email caroline@smartrubric.com to get personal help.  Typically, exam specifications will give you guidance about how much each assessment objective is worth, but it isn't always clear how best to represent that in SmartRubric. I'm going to go through an example where some assessment objectives are weighted more heavily (worth more) than others. I'll break down the mark scheme, and then build it in SmartRubric. EXAMPLE: 

Tutorial: Cleaning up out of date Rubrics

Image
Rubric proliferation can happen to anyone. Here's how to stop it.  Because SmartRubric makes it easy to share, duplicate and modify rubrics, sometimes you end up with old, out of date ones clogging up your library. You won't be able to delete them (unless they've never been used to asses work, in which case go wild. The delete option is under the 'Action' menu in the rubric). SmartRubric won't let you do anything to a rubric that will louse up the marks of students who have already been assessed by it. So, here's what you do. Go into the detail view rubric you want to get rid of (Rubrics > Your Library > {Rubric}). Everything is going to be under the 'Actions' dropdown button, here: 1. If the rubric has been shared with your school, click 'Unshare with school'. Now it has been removed from the School template library, and no one else can accidentally add it to their library. 2. If the rubric has been favourited (the red he

How to: Customising a rubric for your specific class

Image
The whole point of SmartRubric is to make feedback more targeted and helpful for students, and to make your marking workload smaller and more manageable. If you aren't customising rubrics you might be making your life and the lives of your darling students much more difficult and confusing. Don't worry, it's easy. I'll walk you through it. Here's a scenario for you: You are a KS3 teacher. Your department has a big 'master rubric', which contains all of the strands that are assessed in your subject, and all of the possible levels a student could be at for years 7, 8 and 9. That means, maybe, 12 or thirteen levels and ten strands or so per core skill on multiple tabs. It's colossal, but really  useful because it contextualises and maps out pretty much the entire curriculum. If you are sharing rubrics across a department, I highly recommend having one of these. Email me if you want help building one. So, the beauty of having one of these is that you,

Managing rubrics for a wide range of abilities

Image
Or, 'Help my rubric is enormous and my AFL sheets look terrible!' With the addition of the ability to create multiple assessments across different classes , a new and exciting issue has cropped up. Since your 'multiple assessments' all need to use the same rubric , you'll probably end up needing one that covers a much  broader range of abilities (this advice applies to single assessments for mixed-ability groups, too). Sometimes, this means you end up with a rubric that has upwards of eight or nine bands! This causes some issues with formatting your AFL sheets, because SmartRubric tries to cram all of your bands onto a single sheet of paper for your student. I'm working on a smarter, more comprehensive fix, but until that's ready, I've made you a special 'giant rubric' AFL template. From now on, if you try to download your whole class AFL sheets on one of these giant rubrics, you'll get a little alert showing up, like this: "It

Get organised now!

Image
Your future self will thank you! Hello teacher friends! I hope your summer holidays have been both restful and restorative. Since it's the beginning of the year, now would be a great time to take advantage of the many organisational tools that SmartRubric offers to help you conquer your marking before it turns into a giant snowball/hamster wheel of doom. But first, some housekeeping: For those of you who are setting up SmartRubric for the first time, please check out our series of helpful tutorials and videos to help you make the most of your new SmartRubric account: How to  set up your account and start marking in less than 10 minutes  (<-- start with this one) How to set up your account - more detail and resources How to set up a class How to create a smart rubric How to feed back to students Once you have your account set up, you might be interested in some of the more advanced features of SmartRubric. You can find a list of relevant tutorials here . 

How to roll up your cohorts up in SmartRubric

Image
If you are a department administrator or a single teacher (you don't share your SmartRubric account without other teachers at your school), you're probably going to want to roll up your cohorts for the start of the 2017/18 school year. That way, your dear little year 7s will become cheeky year 8s, your 8s will become sulky 9s and so on. Graduating students get sorted into an alumni group, and a new incoming class is created.* *Before you do this, make sure the list of year groups accurately reflects your school's intake. So, if you are a secondary school, you should have a Year 7 group even if you don't have any students in it. Otherwise it'll snarl up the magic.  The more eagle-eyed amongst you may have already noticed that there is (for a limited time only) a great big button to help you do this. The button appears in the summer, and lasts for three months into the school year. If you miss the window, don't panic. Just drop an email to  support@smartru

New Feature: Multi-class assessments

Image
As a department lead, you may wish to schedule formal assessments for your entire department in advance.  So, for example, you know that the top three year 10 English sets are going to sit a partial mock exam just before Christmas. As long as all of the assessments use the same rubric , you can link them together by creating a multiple class assessment. All you need to do is click on the yellow 'New multiple class assessment' button on your dashboard, or select 'Assessments > New Multi-Class Assessment' from the navigation menu.  The process of creating a multiple class assessment is identical to creating a regular assessment, except instead of selecting a single class from the drop down, you can select as many as you like.  When you create a master assessment in this way, a new assessment for each class you select is added. These new assessments behave exactly like any other assessment -- they show up in the to-do list and gradebook of the responsib

How to Feed Back to Students

Image
You've marked an entire set of books (or just one student) using SmartRubric, and now you would like to pass that feedback on to your students. Great! Here's how you do it.  (If you would rather watch a one-minute video demonstration, you can do that here ) Option 1: I want to print (or save a PDF) a feedback sheet for a single student : When you have finished marking a piece of student work, you will see something like this:  Click it! Click 'Go to detailed student report'. This brings you to the report for that student. Scan it over, make sure you like what it says, and then go ahead and click the print icon in the top right corner of the report:   Now, if you want to print it out right then and there, you can go ahead and do that. You might need to mess around with the layout (change from portrait to landscape or vice versa depending on your particular printer/browser configurations). If you print in colour, you'll get snazzy colour blocks to h

Set up your account and start marking in less than 10 minutes

Image
Set up your SmartRubric account, add a class full of students, build a custom rubric and create an assessment in less time than you think. I know that as a teacher, your time is really precious. Perhaps you've been putting off getting to grips with SmartRubric because you're swamped with work. I know how it goes. But, did you know that you can completely set up your account, create a custom rubric and start marking real student work in less than ten minutes? For a time investment of just ten minutes, you could be saving hours on time spent marking this term! I recorded a real-time video as I set up a brand new SmartRubric account. I made a rubric for an in-class English Literature assessment, but you could evaluate anything you like. All you need to get started is a SmartRubric account ( get one for free here ), a list of the students in the class that you would like to asses, and a clear idea of the skills or objectives for your assessment. If you haven't a

New Feature: User submitted rubrics in the Template Library

Image
We've made it even easier to get high quality rubrics to use with your classes by making some major improvements to the Template Library . Now, not only is it easier to find what you are looking for (rubrics are now grouped by subject and searchable by Key Stage/Grade), but all  users can publish rubrics that they have created to the Template library. Hooray! In this post, I'll cover the features of the new Template library and  how to publish your lovely rubrics to it. Part the first: The new Template Library The new Template Library The new template library has a subject menu, so you can zero in on the rubrics that are likely to be most useful for you. The badge icon lets you know how many rubrics are tagged with that subject. Help us fill them up! A detailed view of a rubric To get a closer look at a specific rubric, just click on it. A detail window will pop up, and from there you can preview the full rubric, copy it into your library or rate it . The gre

Awesome new progress reports!

Image
The final feature that we planned to implement before the launch (!) at Bett 2017  is complete, and I am maybe even more excited about it than I was about moderation . You now have access to a fully featured query engine that lets you drill down into specific student groups and track progress. You want to compare how Year 11 is performing compared to year 7 versus the whole school? Easy peasy, lemon etc: HOT.  You want to compare how year 7 EAL history students are progressing against literacy objectives with how they are doing in science? You only need to think it and it is so! What's that you say? You want a nice line graph that maps it all out for you against a baseline? Why certainly! Your assistant head prefers raw data so she can make her own infographics? We have you covered. The query engine means you can filter student progress by a whole range of student, subject and skill characteristics. So, if a key group for you is lower income white boys, or G&T bengali

A guide to Department Administrator accounts

Image
If you are finding SmartRubric useful as an individual teacher, you might not realise how much more  useful it can be if you use it with a department or school. Broadly speaking, within a department or school, you can share student data and look at how students are progressing against key skills across the curriculum. It also gives you the ability to moderate work and communicate directly with your colleagues. This level is an area that we are excited to develop, and we are really interested to hear what you have to say about what would make SmartRubric most useful for you and your department. All you need to do is upgrade your account by going to your Billing Area  and select 'Administrator Subscription'. Decide how many members of your department you want, and create your subscription. You'll need to log out and back in again once you've done this. Once you have administrator rights (you will know because your navigation bar will turn teal and you get some extr

Importing and exporting SmartRubric (.srm) files

Image
In order to help you make the most of SmartRubric, we've given you the ability to import and export the rubrics that you (and others!) have made. If you would like to share a rubric: It's easy! All you need to do is make sure you have got your rubric the way you want it (don't forget the grade boundaries!), and click 'export' in the library. The file will automatically be saved in your downloads folder. It will have the file extension .srm, which just means that it's encoded and can only be opened by SmartRubric. You can share .srm files by email, post them online or share them on a memory stick. If you would like to import a rubric: If someone has sent you an .srm file or you found one online that you would like to use, it's easy to import it into SmartRubric. From anywhere in SmartRubric, just go to 'Rubrics' in the main menu and select 'Import'. When the modal pops up, click 'select' and find the file you wis

Getting Started with SmartRubric

To get the most out of SmartRubric, here is quick start guide to help you. Please don't hesitate to get in touch if you would like some help. Set up your school Important: Add the Year Groups that your school teaches (this will enable you to add classes). You can also set up pastoral groups, such as form groups/homerooms or houses. This is optional and not necessary for quick setup. Customise the type of data that your school stores about students by selecting from the list. Update the school's address and other details. C

How to create a new class in SmartRubric

Image
Creating a new class in SmartRubric couldn't be easier.

How to create a Smart Rubric!

Image
We're not gonna lie, creating effective rubrics is tough -- whether you do it the old fashioned way with pen and paper, or with SmartRubric. SmartRubric is designed with assessment best practice in mind to help you create rubrics that are effective for both and your students. Before you create a Smart Rubric, you should have a look through the slideshow. It will help you prepare your assessment materials. Once you have done that, check out the video to see how to turn your prepared assessment materials into a Smart Rubric. Step 1: Prepare your rubric Preparing a rubric from MissLesniak Step 2: Create your Smart Rubric